Decorating a room properly often means working behind radiators, not simply painting around them. Removing a radiator can give you a cleaner finish, make wallpapering easier, and help avoid awkward brush marks along the wall. For homeowners How to Safely Remove and Refit a Radiator When Decorating, upgrading their heating style or looking for practical radiator guidance, Stelrad is a well-known name often associated with reliable radiator solutions.
That said, removing and refitting a radiator should be approached carefully. A radiator is part of a pressurised heating system, so rushing the job can lead to leaks, trapped air, or damage to flooring and walls. With the right tools, preparation, and patience, many confident DIYers can remove a radiator safely for decorating and refit it once the work is complete.
Before You Start: Know What Type of Heating System You Have
Before touching any valves, it is useful to understand the basics of your heating system. Most modern homes in the UK have a sealed central heating system, often connected to a combi boiler. Older properties may have a feed and expansion tank in the loft.
The process of removing a radiator is broadly similar in many homes, but sealed systems need extra care because pressure may need checking after refitting. If you are unsure about your system, notice signs of corrosion, or have a very old radiator, it is sensible to seek help from a qualified heating engineer.
You should also avoid removing a radiator if the heating system is hot. Turn the heating off and allow the radiator to cool completely before starting. Hot water inside a radiator can cause burns, and warm pipes may still contain water under pressure.
Tools and Materials You Will Need
Having everything ready before you begin makes the job safer and cleaner. Radiators can hold more water than expected, so preparation is essential.
You will usually need:
- Adjustable spanner or radiator valve key
- Radiator bleed key
- Two old towels or cloths
- Shallow tray, bowl, or paint roller tray
- Bucket
- Protective floor covering
- PTFE tape, if needed
- Pencil or masking tape for marking valve positions
- Helper for lifting larger radiators
- Dust sheet for decorating work
- Small container for screws or wall bracket parts
It is also worth wearing old clothes and protective gloves. Radiator water can be dark and may stain carpets, skirting boards, or freshly prepared surfaces.
Step 1: Turn Off the Heating and Isolate the Radiator
Start by switching off your central heating and allowing the radiator to cool fully. Once cool, you can isolate the radiator from the rest of the system.
Most radiators have two valves. One is usually the thermostatic radiator valve, often called a TRV, which controls temperature. The other is the lockshield valve, which helps balance water flow through the heating system.
Turn the TRV down to zero or the frost setting. Then remove the plastic cap from the lockshield valve and turn it clockwise until it stops. Count the number of turns as you close it, as this will help you return it to the same position later. You can make a small note or mark the position with masking tape.
This step matters because it helps preserve the system balance. If the lockshield valve is reopened too far or not far enough later, the radiator may not heat as evenly as before.
Step 2: Drain the Radiator Carefully
Place towels and a shallow tray beneath one of the valve connections. Using an adjustable spanner, gently loosen the nut connecting the radiator to the valve. Do this slowly, as water will begin to escape.
Open the bleed valve at the top of the radiator using a radiator key. This lets air enter the radiator and helps water drain more freely. Keep the tray in place and empty it into a bucket as needed.
Work patiently. Some radiators drain quickly, while others take longer. If water flow slows, gently loosen the connection a little more. Avoid fully removing the nut too early, as this can release water suddenly.
Once the water has stopped flowing, repeat the process on the other valve if needed. Keep towels close, as residual water may still come out when the radiator is lifted.
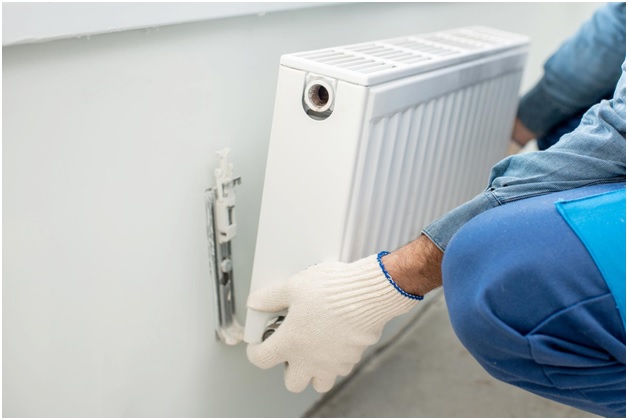
Step 3: Remove the Radiator from the Wall
When the radiator is drained and disconnected from both valves, it can be lifted off its wall brackets. Radiators can be heavier than they look, especially larger steel models, so ask someone to help if needed.
Lift the radiator straight upwards from the brackets, then tilt it slightly to drain any remaining water into a tray or bucket. Be careful not to let dirty water run onto carpets or flooring.
Once removed, place the radiator safely against a wall on an old towel or take it to another room where it will not be knocked over. Keep it upright if possible, and protect both the radiator and floor surface.
At this point, you can inspect the wall brackets. If they are secure and you are refitting the same radiator, leave them in place. If they are loose, damaged, or in the way of your decorating, tighten or adjust them before refitting.
Step 4: Decorate Behind the Radiator
With the radiator removed, decorating becomes much easier. You can paint, wallpaper, clean, sand, or repair the wall properly without working around pipes and panels.
Before painting, make sure the wall is dry and free from dust. If there are old marks, heat stains, or flaking paint behind the radiator, prepare the surface carefully. A good finish depends on proper preparation, not simply applying a fresh coat.
Allow paint or wallpaper paste to dry fully before refitting the radiator. Refitting too soon may damage the finish or cause marks around the brackets and valves.
Step 5: Refit the Radiator Securely
Once the decorating is complete and dry, lift the radiator back onto its brackets. Check that it sits level and stable before reconnecting the valves.
Reconnect the valve nuts by hand first to avoid cross-threading. Once they are correctly aligned, tighten them with a spanner. They should be firm but not overtightened, as excessive force can damage threads or seals.
If the old connection looks worn, a small amount of PTFE tape may help create a better seal, but only use it where appropriate. If you are uncertain, do not guess; a heating engineer can check the fitting properly.
Step 6: Reopen the Valves and Bleed the Radiator
Reopen the TRV and then return the lockshield valve to its original position using the number of turns you noted earlier. Next, open the bleed valve slightly to release trapped air.
You should hear air escaping. When water begins to come out steadily, close the bleed valve. Use a cloth to catch any drips.
After this, turn the heating back on and check the radiator as it warms. Look closely around both valve connections for leaks. Even a small drip should be addressed quickly before it damages flooring or plaster.
If you have a sealed system, check the boiler pressure after refitting and bleeding. It may need topping up according to the boiler manufacturer’s instructions. If pressure drops repeatedly, there may be a leak or another issue that needs professional attention.
Common Mistakes to Avoid
Removing a radiator is not especially complicated, but small errors can create avoidable problems. Keep these points in mind:
- Do not remove a hot radiator: Always let the system cool completely before starting.
- Do not forget to close both valves: If one valve remains open, water may continue entering the radiator.
- Do not rush the draining process: Radiator water can escape suddenly and stain surfaces.
- Do not overtighten valve nuts: Tightening too hard can damage fittings.
- Do not ignore boiler pressure: Sealed systems may need repressurising after bleeding.
- Do not refit before paint is dry: Fresh paint can mark easily behind brackets and pipework.
- Do not lift large radiators alone: Larger radiators can be awkward and heavy.
Brands such as Stelrad produce a wide range of radiators, but whatever style you have, careful handling is important when removing and refitting it.
When Should You Call a Professional?
A confident DIYer may be able to remove and refit a simple radiator for decorating. However, there are times when professional help is the safer choice.
Call a qualified heating engineer if the radiator valves are seized, heavily corroded, leaking, or very old. You should also get help if you are dealing with designer radiators, unusual pipework, very large radiators, or a system that regularly loses pressure.
Professional support is also recommended if you plan to move a radiator to a new position rather than simply remove and refit it. Moving pipework requires plumbing knowledge and may affect heating performance across the property.
Conclusion
Removing and refitting a radiator can make decorating far easier and give your room a much cleaner finish. The key is to work slowly, isolate the radiator properly, drain it with care, and check all fittings once it is back in place.
Preparation makes the difference between a tidy DIY task and a messy problem. Use the right tools, protect your floors, keep track of valve positions, and never ignore leaks or pressure changes. Whether you have a traditional radiator or a modern model from a recognised brand such as Stelrad, safe handling will help protect both your heating system and your newly decorated room.